User Tools
Table of Contents
Laser Cutter HOW TO
Note: This was originally written in December 2011 for the 25 Watt Laser Cutter. Things may have changed since then.
Introduction
This HOW TO will cover using the Universal Laser Systems Laser Cutter in the Workshop.
The Laser Cutter is expensive and dangerous. Try not to leave it unattended while in use. Things can start on fire.
Some jobs take a long time to run. If you need to run to the bathroom or something, find someone to watch it for you.
Starting up the Laser Cutter
You will need to turn on the vacuum pump attached to the Laser Cutter, and then the Laser Cutter, and then the computer attached to the Laser Cutter.
Note that the PC needs to boot up into Windows XP Professional. At boot time it *should* go into Windows, but if it boots into Linux, something is wrong.
Laser Cutter Adjustments
Open the lid and place your material into the top-right corner of the work area near the head which holds the laser sits.
There is a small block of wood that is two inches tall which is used to raise and lower the work area bed so that the laser properly focuses on the material. Place the wood block on top of your material to determine the distance, and then crank it up or down to the correct height.
Once you've set the height you can place your material into the top-left corner of the work area.
Software
The software most people are using is CorelDraw 12.
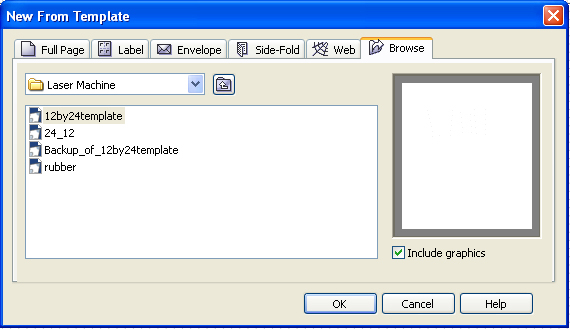
When you open it, you can create a new file from the existing template named “12by24template”.
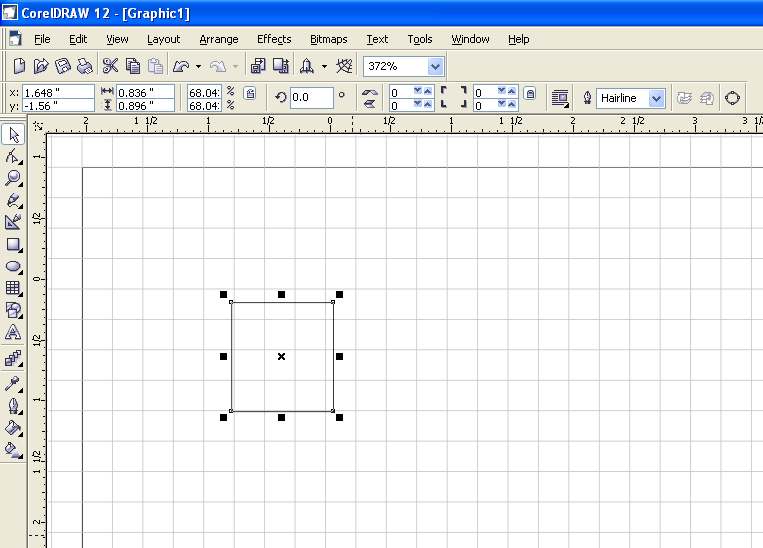
Once you have your template file loaded, you can create your artwork, or import a file.
I've found that DXF files seem to work for vector format, and PNG works for raster format. It should be noted that there is a documented problem when importing SVG's into CorelDraw…it will rescale them to roughly 3/4 of their original size. No one seems to have a fix for this yet, but the other formats work just fine. Found a workaround, since Corel Draw can easily import a PDF file. You can use InkScape which is a free program. So in Inkscape you save svg as pdf, then open CorelDraw and import the pdf. In addition to PDF, CorelDraw can also import DWG/DXF (AutoCAD), EMF/WMF, PS (PostScript) – all of which Inkscape knows how to export.
Make sure you do a 'Save As' and give your file a name. (You'll thank me when the circuit blows and the PC loses power.)
Now you've got your artwork ready, so you want to 'Print' it.
The Laser Cutter uses the standard print dialog to set all the settings.
Click that 'Properties' button on the right side of the screen.
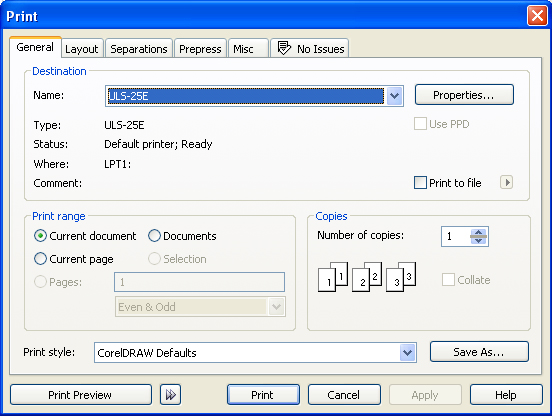
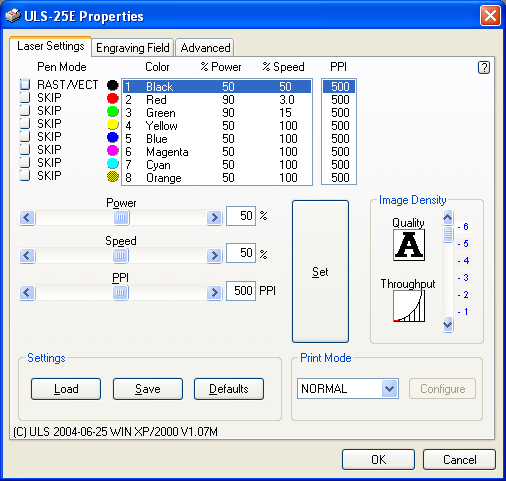
You should see the Properties dialog.
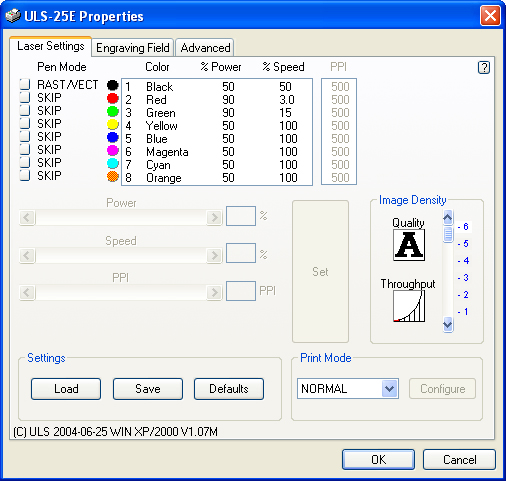
The color you made your artwork can be matched up with a setting for the Laser Cutter.
In this case, we are only using black, so click on 'Black' in the list.
You'll see that Power, Speed, and PPI can now be adjusted. Adjust them as needed and click that big 'Set' button to the right.
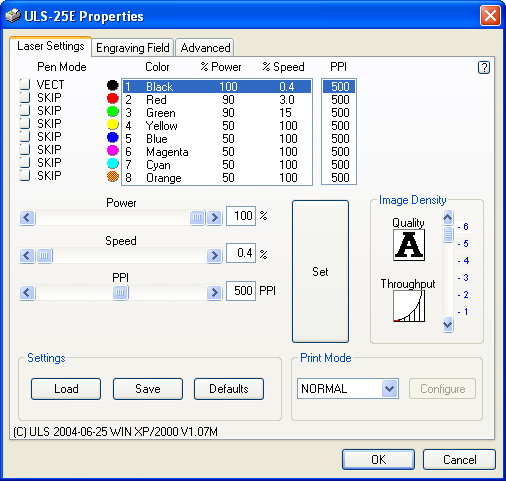
The “image density” setting varies the DPI (not PPI) and determines how many horizontal passes are made per one vertical inch of travel when raster engraving. High image density = 6, slowest, highest quality Low image density = 1, fastest, lowest quality A setting of 4 or 5 will generally produce an acceptable image faster than always using 6
You might also notice that in the screen shot below to the left of 'Black' it says 'VECT' – This is because you can choose raster or vector (or both) for each color. Think of the different colors as layers, with the ability to set different cutting/etching to different layers. So you could have all of your black lines be set to etch something, then have a red outline set to cut something.
(There's more to explain here… check back later!)
Preparing Adobe Illustrator Files
This is a prefix detailing how I (Shane T.) use Illustrator CS5 to create files for laser cutting via CorelDraw 12.
1.) In order to import into Corel, the colors must be CMYK. For example, to get “Red” (that Corel will understand as Red), you would use 100% Magenta and 100% Yellow, 0% for Cyan and Black. The same goes for the rest of the colors. If Illustrator is altering the percentages after you enter them, you need to go to File–>Document Color Mode–>CMYK.
2.) For vector cutting and etching, you need to set the stroke weight to .001. This will translate to “Hairline” when you import into Corel.
3.) For text, make sure you select the text object, then go to Text–>Create Outlines. This will solve any problems that arise from not having the appropriate font installed on the Laser Cutter Computer.
4.) To save things properly, select “Save As”. In the top-most drop-down box, select “Illustrator 8”. If the options “Preserve Appearance” and “Preserve Paths” appear (that only happens sometimes), make sure to select “Preserve Paths”.
5.) “Import” into CorelDraw 12. Double check your colors! If something isn't the exact named color, the printer driver will interpret it as grayscale and attempt to raster etch it with the power and speed settings under “Black”. You can select a line, then check the Object Properties tab. If you hover over the color that's selected in the palette, the name of the color should appear.
Corel Draw will directly (and mostly correctly!) import Adobe Illustrator files if they are prepared properly. The newest Illustrator file format Corel Draw will read is version 10. From Illustrator, save your files as Illustrator 10 format and things should mostly work. I (Jason G) have had good luck getting the file to import with the correct dimensions. The colors i specified were not the pure primary colors that the laser expected, so i did need to muck about with the colors.
For fonts in Illustrator, make sure to convert them to outlines before exporting.
The equivalent line/stroke thickness in Illustrator for Corel Draw's “Hairline” is 0.216 pt or .003 in or .0762 mm. If you set up your strokes with this width, Corel Draw will understand them as “Hairline” and you will be all ready to cut.
TODO(jgessner): Figure out the appropriate color settings for export.
Another important thing to remember in Illustrator is that (supposedly - i need to verify this) a .1 pt stroke is equivalent to the “Hairline” setting that Corel Draw and the Laser Cutter expect.
Note: A “0” setting does, in fact, read as “Hairline”, but it will lose all the color information and revert to black. I haven't tested the .1 either. .1pt stroke does NOT translate into “hairline”. (Shane)
Laser Cutter Control Panel
Once you send your file to print, it should show up on the Laser Cutter Control Panel. If it does not, push the 'Next File' button. Make note of the file number, because if you send multiple jobs, you'll want to keep track of which job is queued before you hit the 'Start' button.
After the Laser Cutter completes a cycle, you can open the lid and inspect your material. Don't move it yet! You may want to run it again with the same or new settings. Doing multiple passes are useful to etch deeper or cut through materials without running at full power. Multiple passes are fine, just don't move your material.
Material Settings
NOTE: These aren't hard and fast rules - always check your job with a scrap of the material you want to use first!
Paper
- Watch out! Paper burns easily! Don't go too slowly or you will light your material on fire.
- 100% power is fine as long as your speed is under N%.
- Jason G had good luck with 80%-100% power and 30% speed.
Baltic Birch Plywood
- 100% Power - 1-3% speed. Experiment a bit with a small pattern because if you go too slowly, the material can flare up pretty quickly.
- Will easily take 3 or more passes, depending on how clean the mirrors are.
- See more notes on the Laser Cutter page.
Cutting HDPE
- Absorbs too much heat, not a clean cut
- Hard to get through 1/8“ material without reflow/melting
- Better machined/CNC-milled than lasered


Direction of wood grain
- When setting up a wood cut, it is best to orient shapes such that the long dimension is parallel to the grain.
- This minimizes how much the piece will warp over time.
- Shape A will curl up more than Shape B.
- See image below:


Plastic Film Sheets
In September 2017 we received a donation of several rolls of plastic film. We think they were dielectric materials used in the manufacture of capacitors. The film seems to hold a cut edge well with little smoke or flame. The plastic has these characteristics, so we believe it is either PP or PET/polyester:
- Denser than water, sinks (not a polyolefin, HDPE, LDPE)
- Curls slightly when melted but does not drip or bubble
- Little smoke/flame, but does burn
- Metallized PP and PET films are used in capacitors from GE


More Information
Universal Laser has a tutorial on laser cutting you may find useful.
