User Tools
This is an old revision of the document!
Table of Contents
Laser Cutter Lens Cleaning HOW TO
Introduction
The 60 watt Laser Cutter needs the lens cleaned to provide optimal cutting power. This tutorial will explain how to clean it.
This HOW TO was originally written on 11/17/12 and revised on 08/11/13.
Cleaning
Tools needed:
- Q-tips
- Phillips head screwdriver
- Flat head screwdriver
- Cleaning solution
- Blank sheet of paper

Lens and first mirror
The laser cutter should be turned off, and you can move the carriage to the center of the cutter to make working on it more convenient.
There are a number of small parts involved, so be careful not to lose any during the disassemble process.

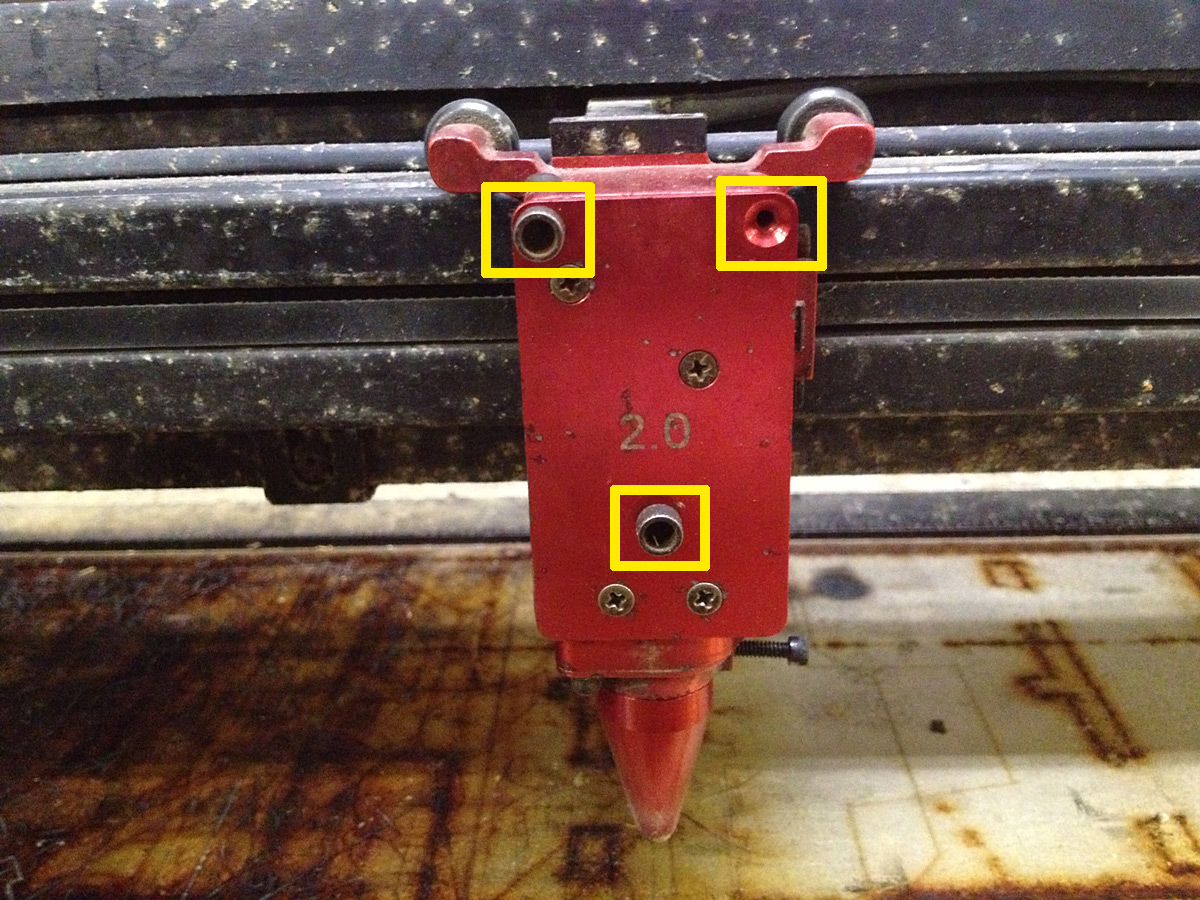

There are a number of screws holding the front cover on. You should be able to remove these with your fingers. (Note: The screws are tiny, do not lose them!)
Once you remove these screws you can attempt to gently slide the cover straight towards you. If this does not work, we'll cover an alternate method.
The two screws highlighted in the photo above hold the lens mount to the cover. If the cover does not come off easily, you can remove these two screws with a small Philips head screwdriver and then remove the cover.


Here's what it looks like with the front cover (and all screws) removed. In this photo we used our 'alternate' method mentioned above, since the lens mount didn't easily slide out with the cover.
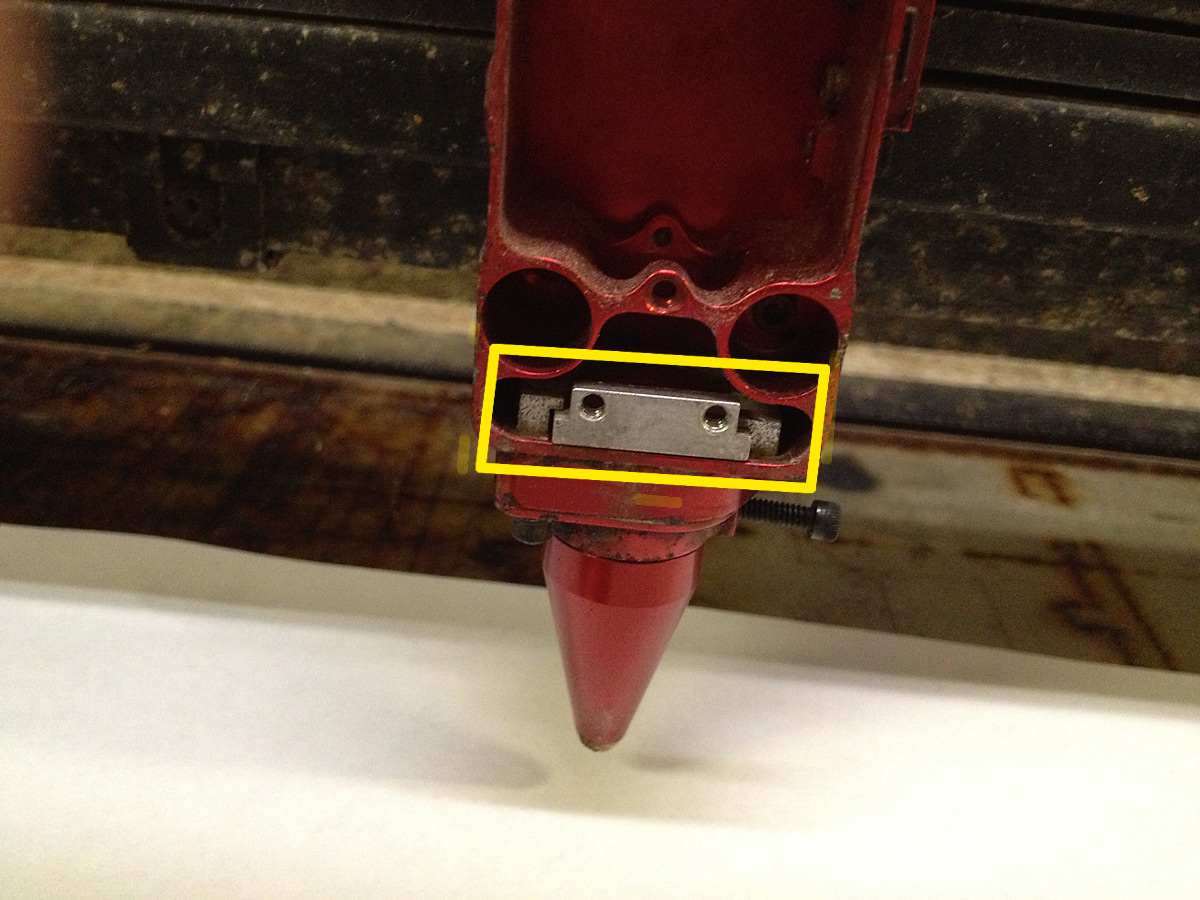
You can now try to slide the lens mount out by gently pulling it towards you with your fingers. If it doesn't move easily, try the following:
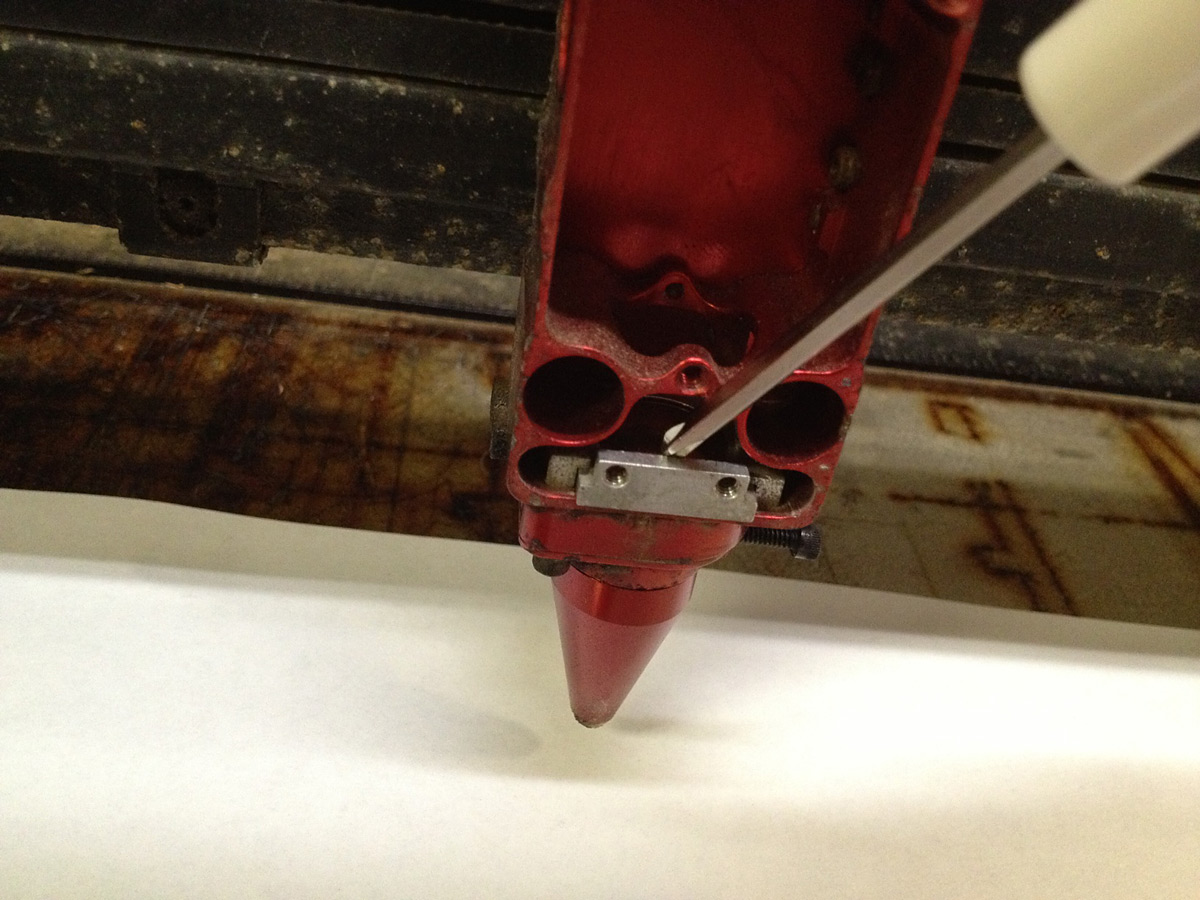
Take the small Philips head screwdriver you may have used earlier and use it to gently pry the front edge of the lens mount until it's out far enough for your to get a good grip and slide it out with your fingers. Pull it all the way out and set it down on a clean(ish) surface.
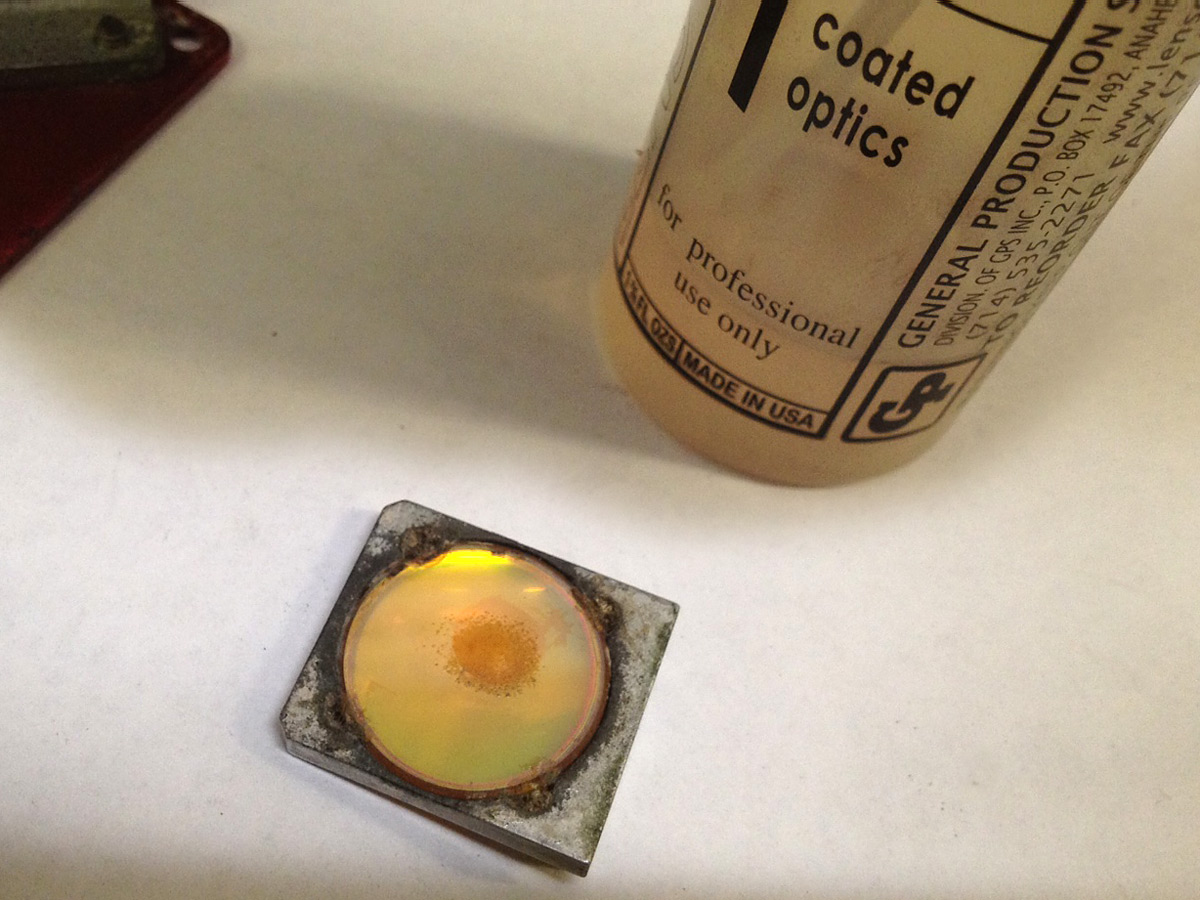
Now we have our lens (in the mount) on a piece of paper. It's ready to be cleaned!
Grab the small bottle of cleaning fluid, and a Q-tip, and add one drop of cleaning fluid onto one end of the Q-tip. Wipe the lens clean on each side using a gentle circular motion, and then wipe the lens dry with the other side of the Q-tip, again on each side. Be sure not to leave any streaks or hairs from the Q-tip on the lens. Let it completely dry, and then reassemble everything in reverse order of the disassemble process.
Oh, and if you look at the last photo and see how the lens has that discolored spot on it… well, that's a damaged lens, and it should not look like that, which is the reason we need to be careful with the laser, always use the air assist and venting system, and clean the lens.
Second mirror
Remove the black rectangular cover from the left side of the carriage. Once removed, swab the mirror in a gentle circular motion with the wet end of the Q-tip then dry with the dry end. Check that you do not leave any streaks or hairs on the mirror. When finished, replace the cover and fasten the screw.
Third mirror
Insert a Q-tip into the hole at the back left corner of the machine and swab in a gentle circular motion. Check that you do not leave any streaks or hairs on the mirror.
Nozzle Alignment
Center small laser dot inside larger circle/dot
Finishing Up
Write down the date & time of the lens cleaning on the log sheet on the front of the laser so people know when it was last cleaned.
Also, before you power on the laser, remember to slide the carriage all the way to the front left so that when it's powered on, it does the right thing. (The “right thing” is home itself without that terrible grinding noise.)
Thanks for reading this!
