User Tools
Adding an image to the Project Gallery
This should walk you through adding an image to the web site using the gallery interface in WordPress.

1. After you log into WordPress, click the 'Add Gallery/Images' link in the left sidebar. You'll see the page as above, with the form to upload images.
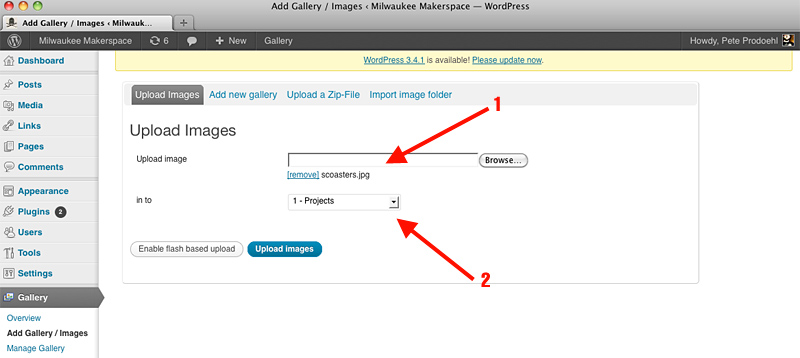
2. Use the 'Browse' button to select your images. They will show up underneath. (1) Note that it may look different depending on your browser.
3. Make sure you select 'Projects' from the drop-down menu. (2)
4. When you are ready, click the 'Upload images' button.
NOTE: Your images will be resized, but we've found that large images fail to resize properly! Try to keep your images less than 1200 pixels wide (or high) so they do not fail.
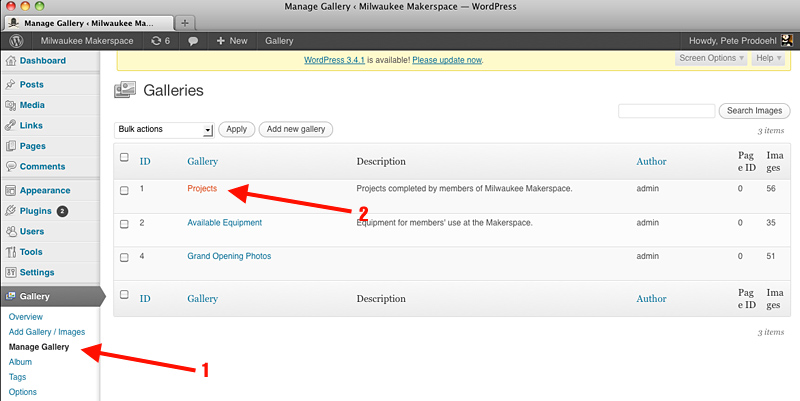
5. Once your images are uploaded click the 'Manage Gallery' link in the left sidebar. (1)
6. You will then see the galleries, and you can click on 'Projects'. (2)
7. You will then see the page showing all the images that have been uploaded.
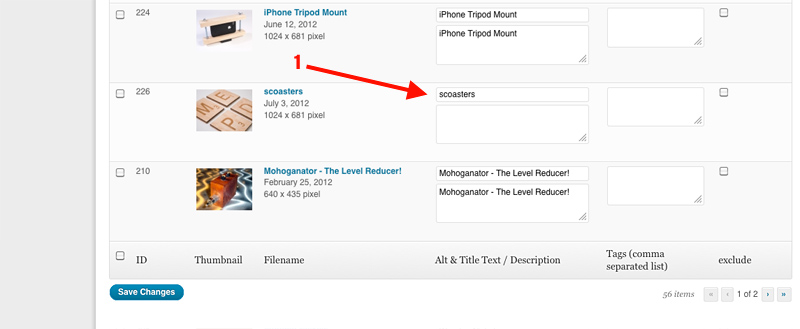
8. Scroll through until you find your image and give it a name. (1) Due to how the gallery is set up, just put the same short name into both fields. (If you don't it'll probably just mess up the display later.)
9. Once you are done naming your image, click the 'Save Changes' button at the bottom.

10. You should now see your image in the gallery! They show up randomly, and there are multiple pages, so you may need to dig around to find it.
11. Celebrate!
If you need an account on the web site, ask Pete or jason g.
