Table of Contents
Installing laser cutter drivers on your personal computer
This page contains instructions for configuring your Windows computer to use the laser cutters at Milwaukee Makerspace.
Before you can add the printer/cutter to your computer, you must download the appropriate V-series ULS drivers based on your OS version, and uncompress to a directory where you can find it later. As of this writing, you want the drivers under the heading “Legacy Drivers - Drivers for M, V and X”
The remainder of this page covers the specific steps to add the laser cutter for Windows 10, Windows 8, Windows 7 and Windows XP.
Windows 10 Setup
- Click the “Windows” button, and type “Devices and Printers” and hit enter
- Click the “Add a Printer” button
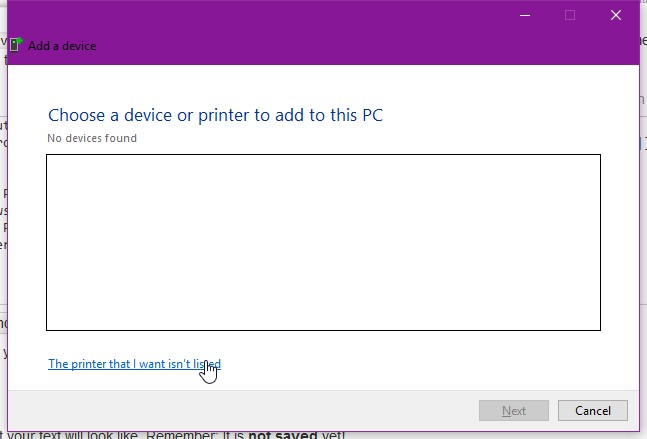
- In the “Add a device” dialog, click “The printer I want isn't listed
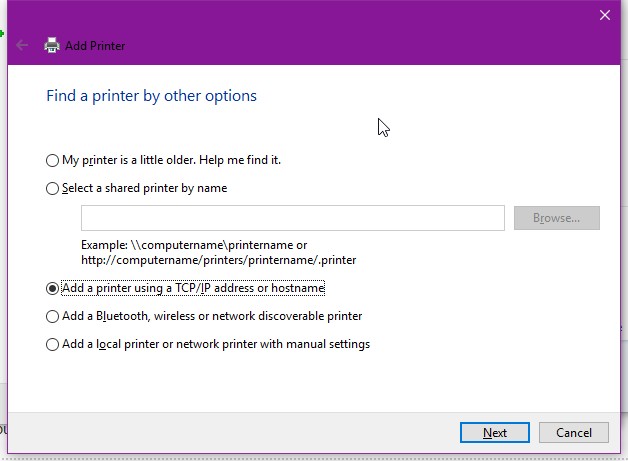
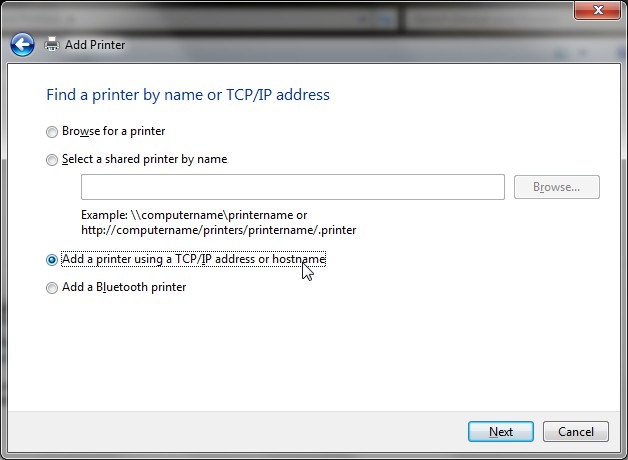
- Click the “Add a printer using a TCP/IP address or hostname” radio button and click “Next”
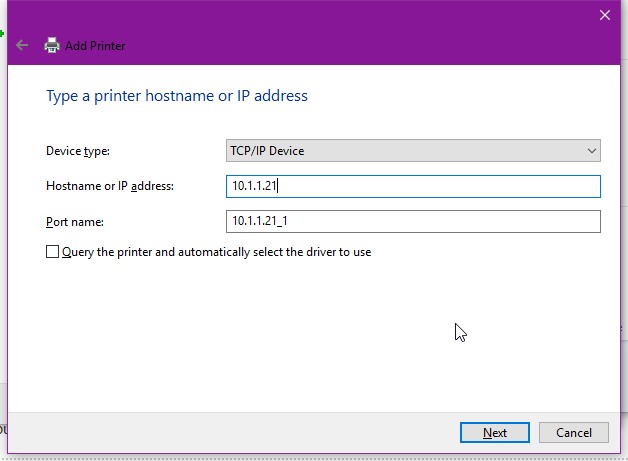
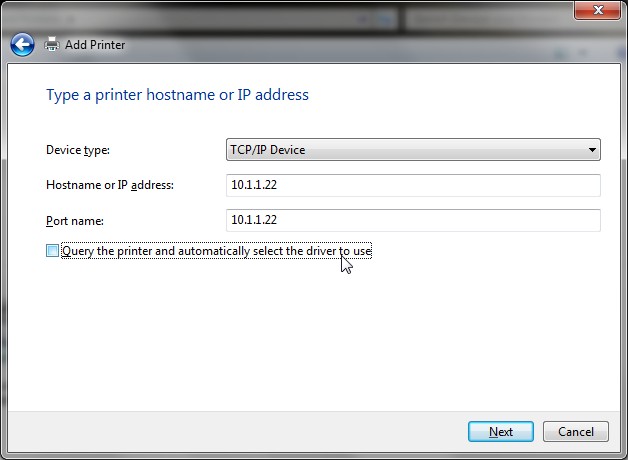
- Select Device Type “TCP/IP Device”, and enter the TCP/IP address for the laser cutter you want to configure:
- Use the following IP addresses:
- 60W: 10.1.1.21
- 50W: 10.1.1.22
- 30W: 10.1.1.23
- Uncheck “Query the printer and automatically select the driver” checkbox
- Click “Next.” Wait a while…
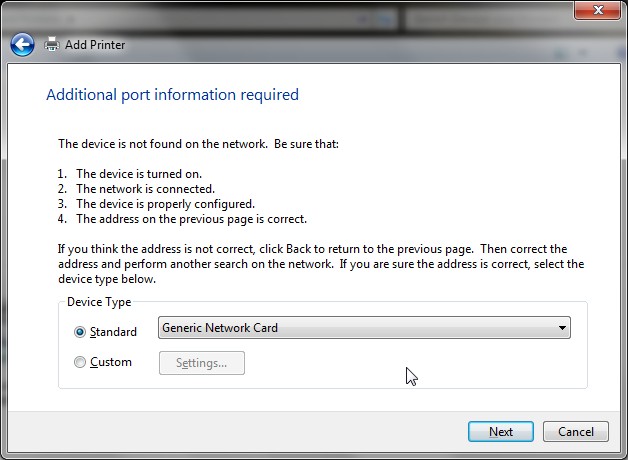
- Leave the “Standard” device type radio button selected, and leave “Generic Network Card” selected. Click “Next”
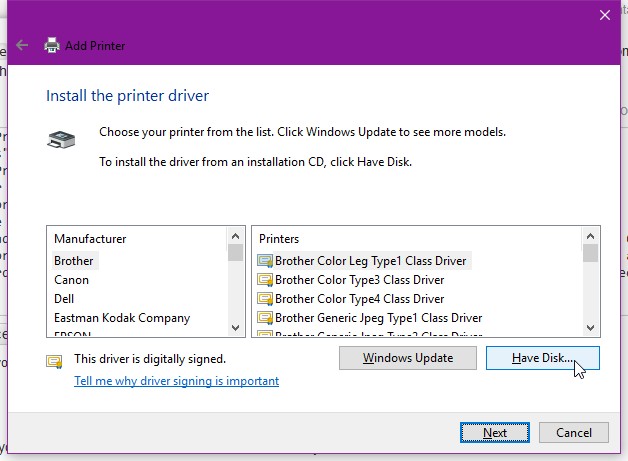
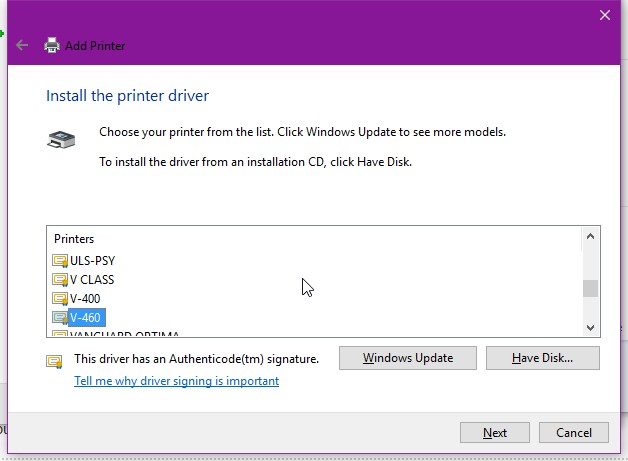
- Click “Have Disk” and navigate to the folder where you uncompressed the drivers
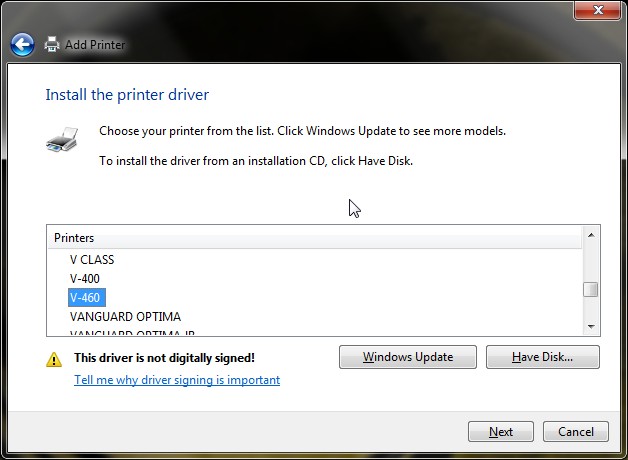
- Select the appropriate printer model
- 60W: V-460
- 50W: ULS-25E
- 30W: X30
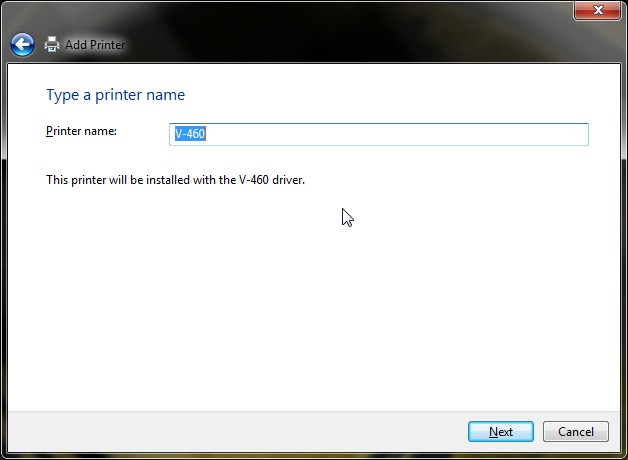
- Give your printer a name, and click “Next” and you're done.
Window 8 Setup
coming soon
Windows 7 Setup
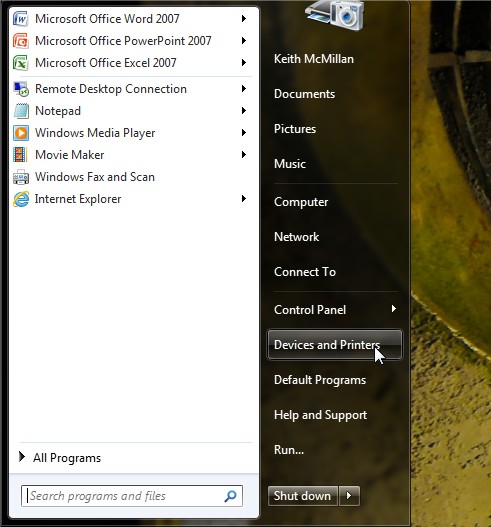
- Click the “Windows” button, and select “Devices and Printers”
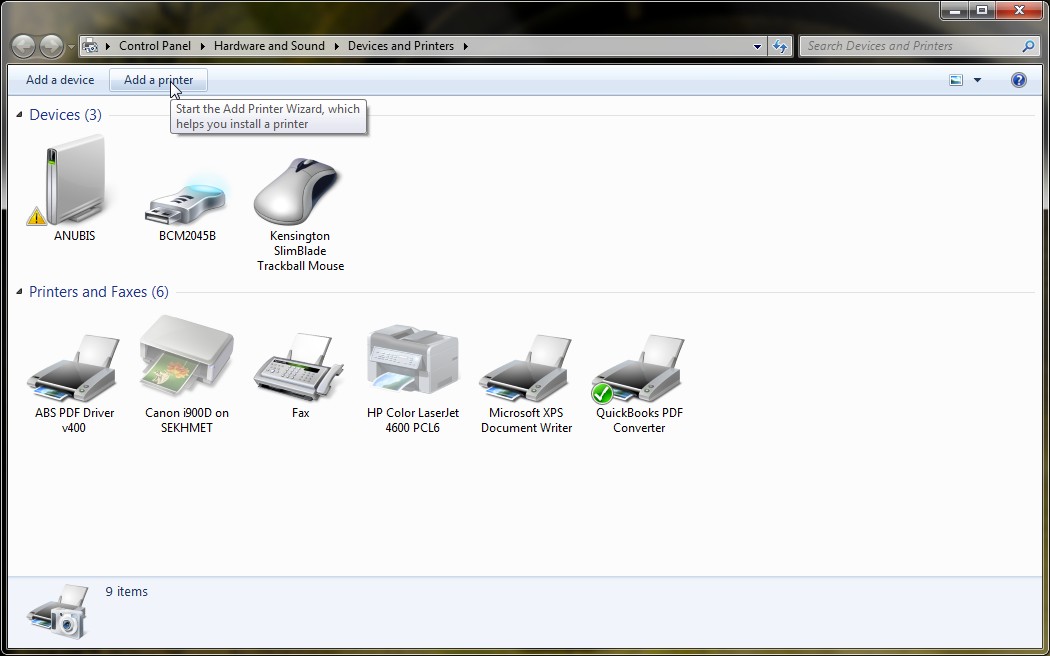
- Click the “Add a Printer” button
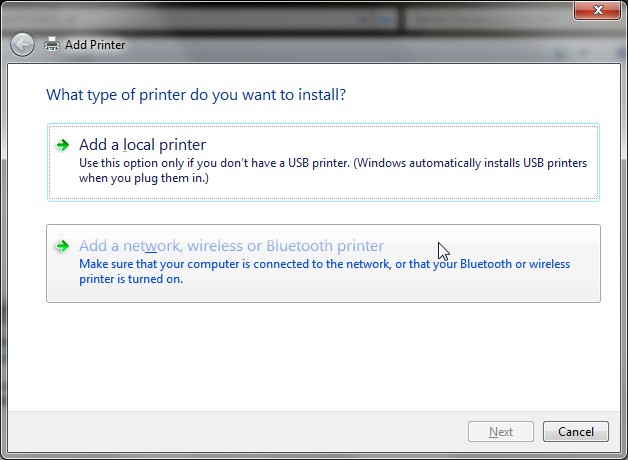
- Click “Add a Network, Wireless or BlueTooth Printer
- In the “Add printer” dialog, click “The printer I want isn't listed
- Click the “Add a printer using a TCP/IP address or hostname” radio button and click “Next”
- Select Device Type “TCP/IP Device”, and enter the TCP/IP address for the laser cutter you want to configure:
- Use the following IP addresses:
- 60W: 10.1.1.21
- 50W: 10.1.1.22
- 30W: 10.1.1.23
- Uncheck “Query the printer and automatically select the driver” checkbox
- Click “Next.” Wait a while…
- Leave the “Standard” device type radio button selected, and leave “Generic Network Card” selected. Click “Next”
- Click “Have Disk” and navigate to the folder where you uncompressed the drivers
- Select the appropriate printer model
- 60W: V-460
- 50W: ULS-25E
- 30W: X30
- Give your printer a name, and click “Next” and you're done.
Windows XP Setup
coming soon

